Importing the asset
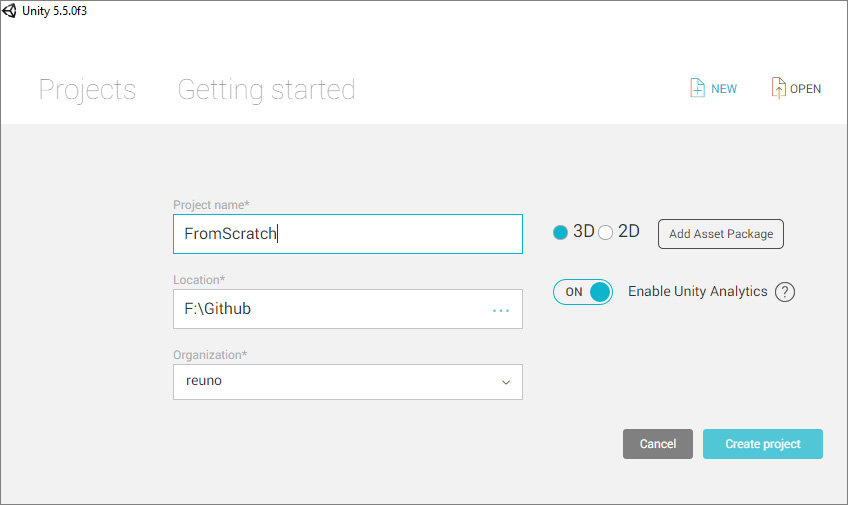
To create a game with the Infinite Runner Engine, you’ll first need to create a new project (or import it to an existing one). So let’s start with that. You can create a 2D or 3D project, the Infinite Runner Engine can handle both. Here we’ll create a small infinite platformer game where our character will have to jump from platform to platform without falling.
Once you’re in your new project, go to the Asset Store (Window > Asset Store), and import the Infinite Runner Engine.
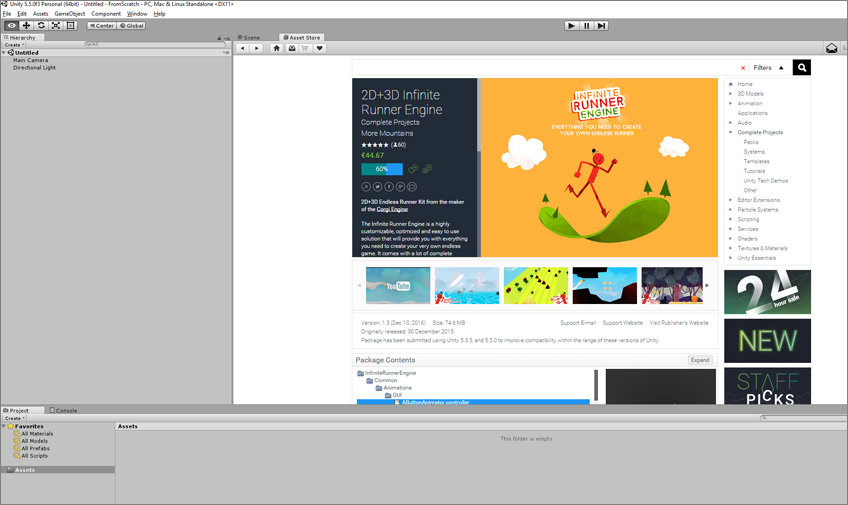
Once the import is complete, this is what you should see in your project’s view:

Setting up the scene
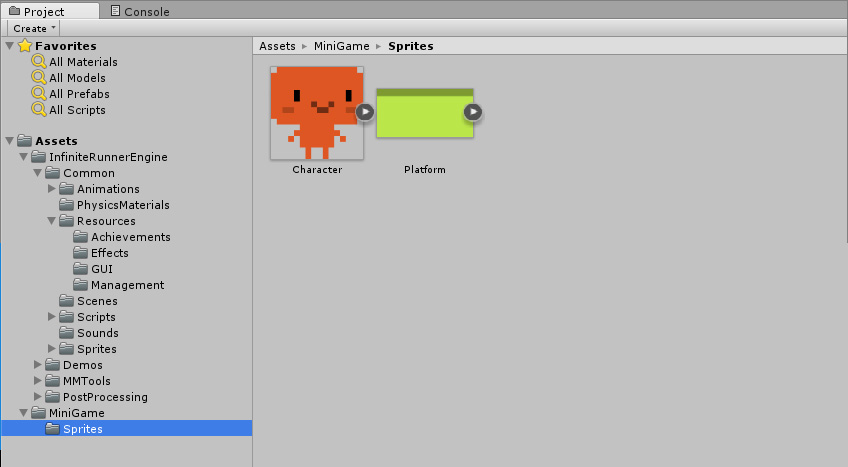
It’s usually good practice to keep things separate, and not modify the Infinite Runner Engine files. That’ll make updating to a new version easier and will ensure you don’t lose your work (read this page for more about how to expand on the Infinite Runner Engine). So start by creating a new folder, let’s name this one MiniGame. That’s where we’ll put our assets. In it, let’s create a Sprite folder, as we’re going for a 2D game in this example. Let’s also create a scene (right click in your project’s view, Create > Scene), and call it MiniGame too. Double click on it to open it. This is what your project’s folder should look like now:

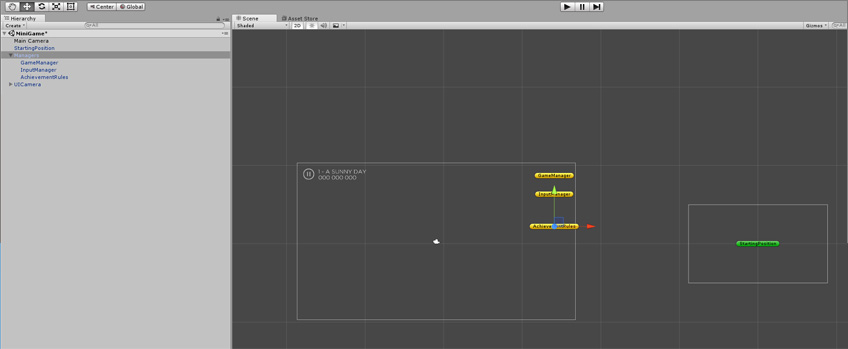
Now in our scene we’re going to add some required elements to kickstart our game. You can find more about them on this page. So in our project’s view, let’s go into the InfiniteRunnerEngine folder, then go to Common/Prefabs/GUI, and drag the UICamera prefab into your scene. Then do the same with the Managers and StartingPosition prefabs in Common/Prefabs/Management.
Creating the LevelManager
Then, create an empty game object in your scene, and name it LevelManager. Then add a LevelManager component to it. We’ll come back to it soon. It’s now time to add some assets in our project’s folder. Add some sprites in your Sprites folder. Here I’ve added a character sprite and a platform sprite:
Creating a Character
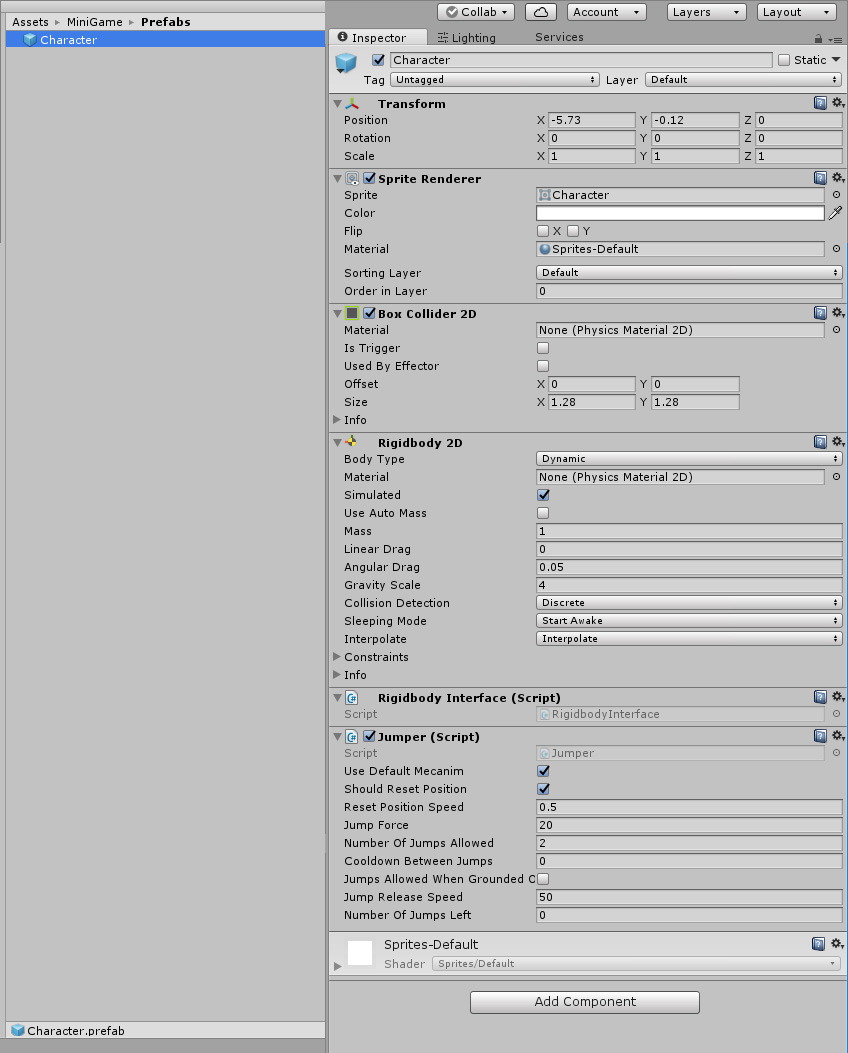
Now let’s drag the Character sprite into our scene. If we’ve set our project settings for 2D when creating the project, this should create a transform with a SpriteRenderer attached to it. We’ll add a few components to turn this into our playable character. Let’s add a BoxCollider2D and a RigidBody2D components. Pressing play now should see our character fall. That’s just fine. Let’s make some changes to the RigidBody2D component : set its gravity scale to 4, and set its Interpolate property to “Interpolate”. Then let’s add a RigidBodyInterface component (this allows the InfiniteRunnerEngine’s controller classes to work with both 2D and 3D), and finally a Jumper component. There are much more controllers included in the engine, you can check them out here if you want, and you can of course create your own. Let’s now create a new folder in our MiniGame folder, and call it Prefabs. Then, drag your character with all its new components from the scene view into it, to create a new prefab. Name it Character.
Creating a Platform
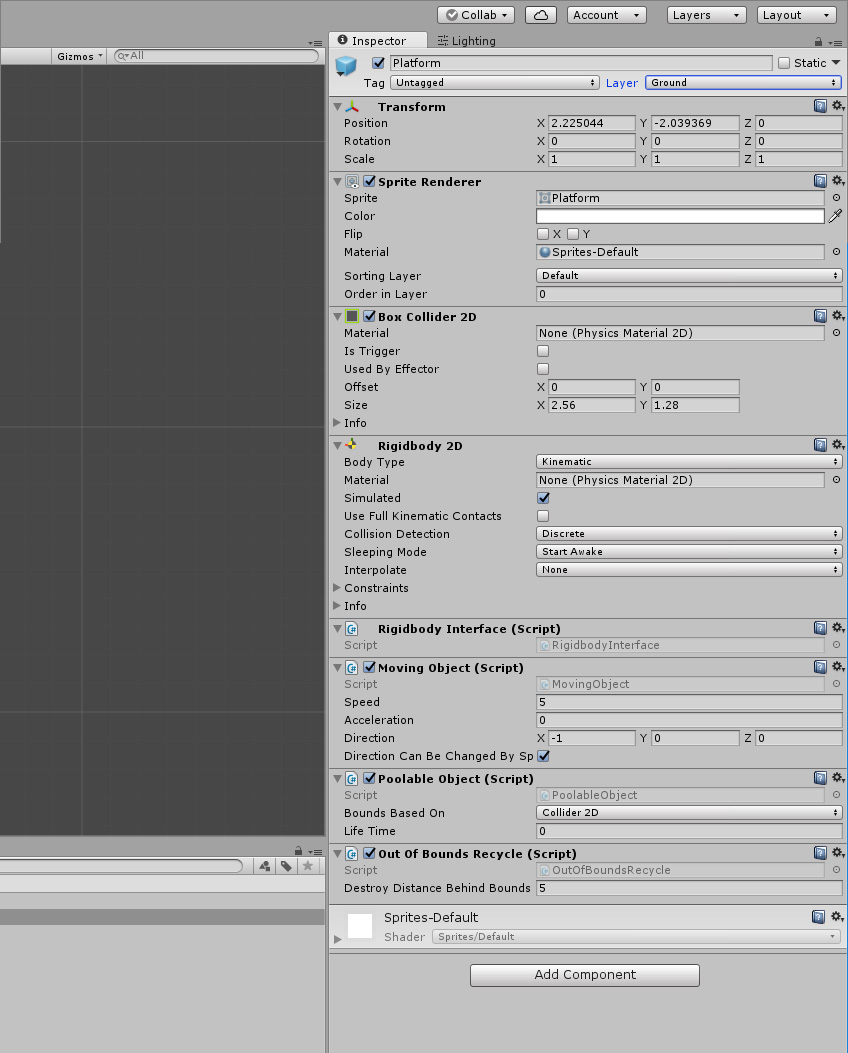
Let’s now drag our platform sprite into our scene. Like for the character, we’ll add a few components to it. Let’s start with a BoxCollider2D and a RigidBody2D. We need that RigidBody2D to have a Kinematic body type. Let’s also add a RigidBodyInterface component to it. What we want to do with this platform is have it duplicated and spawned towards our character so it can jump from platform to platform. It’ll need a few more components to become a spawnable platform. Let’s add a MovingObject component (Speed 5, Acceleration 0, Direction : -1,0,0). This will make it perpetually move towards the left. We then add a PoolableObject component to it, to make it poolable. We set its BoundsBasedOn to Collider2D, its life time to 0. The last component we want to add is an OutOfBoundsRecycle, that way our platforms will be recycled when then exit the area. The last thing we need to do is set its Layer (top right corner of the inspector) to Ground. This will tell our player that this is something it can walk on and jump from. Same as for our character, we’ll now drag our platform from the scene view to the prefabs folder to turn it into a Prefab, and name it Platform.
LevelManager settings
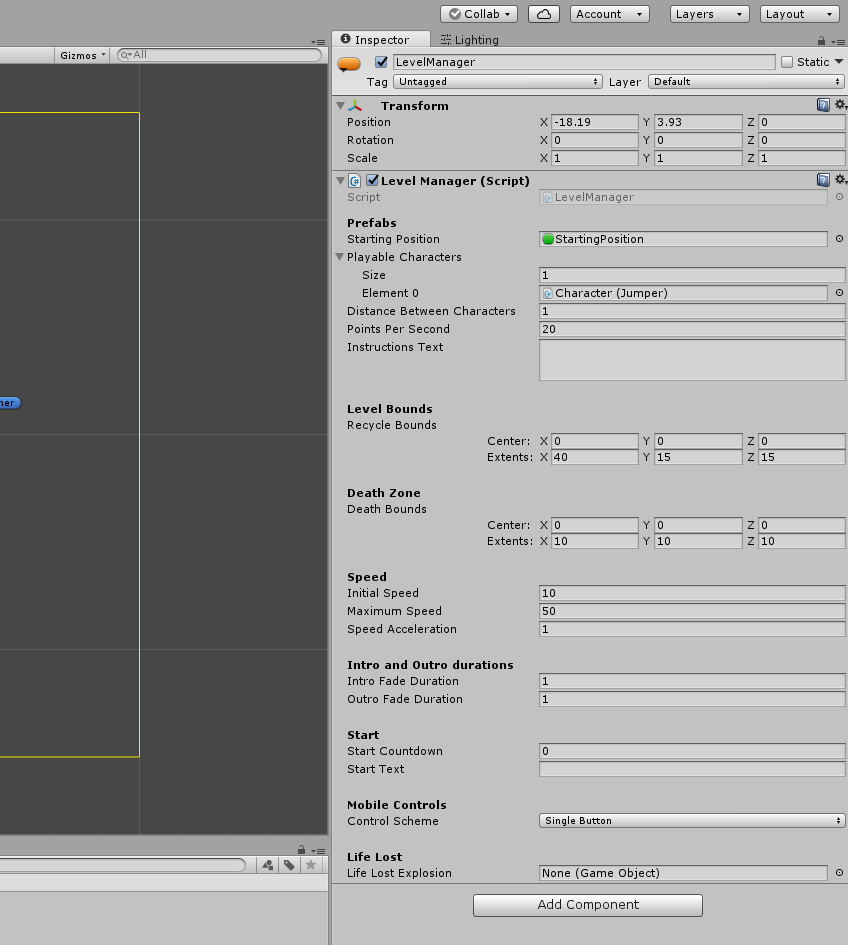
Now let’s go back to our LevelManager. We’ll dive into its inspector and change a few things. First we’ll assign our new Character prefab to its Playable Character slot. To do that, we set our PlayableCharacters’ Size value to 1, and then we can simply drag and drop our prefab into the LevelManager’s inspector’s first PlayableCharacters slot.
We’ll then drag the StartingPosition prefab from our hierarchy view to the slot of the same name in our LevelManager’s inspector. This represents the position where our character will appear on screen when the game starts.
We then need to define our recycle and death bounds. We want to make them bigger than the camera, so the character dies when falling down, and things are only recycled outside of our view. We’ll use the following values, and we can leave the rest as it is:
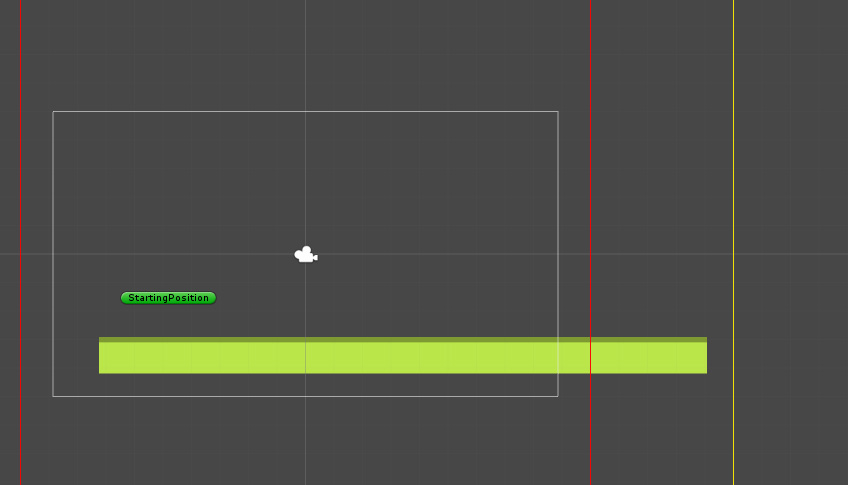
We can now remove our character prefab from the scene (as it’s going to be instantiated by the LevelManager), and press play. What should happen is you should see your character spawn, and then fall to its death. Congratulations! You’ve made a game. Granted, it’s not super fun right now. Let’s change the scale of the platform in our scene to something much larger. This will be our initial platform. Make sure you don’t apply these changes to the prefab though. Let’s make its scale 8 or more, and position it under the starting position, like so :
If we press play, our character should be able to jump a few times on the platform, before it moving definitely to the left, and disappearing, leaving our character alone and dying. Let’s give him some hope by adding the last missing piece of this super simple game: a platform spawner.
Creating the Platform spawner
To do that, let’s create a new empty gameobject. I like to give it a small icon so I can find it easily on the scene view. You can do that by clicking on the small colored cube (?) next to the object’s name in its inspector.
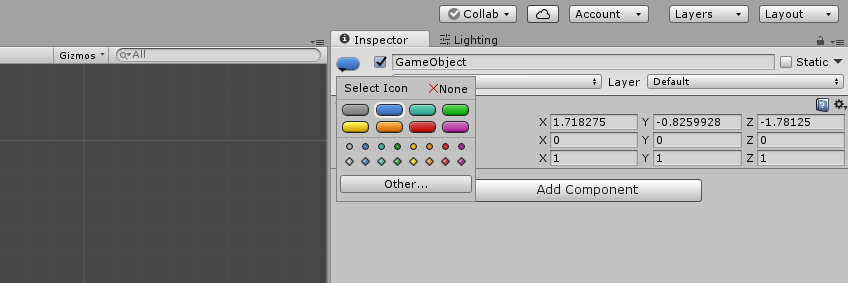
Let’s name it PlatformSpawner. Position it to the right of the camera, outside of its range, around the same vertical level as the initial platform.
Now we’ll add two components to it :
- a SimpleObjectPooler component
- a DistanceSpawner component
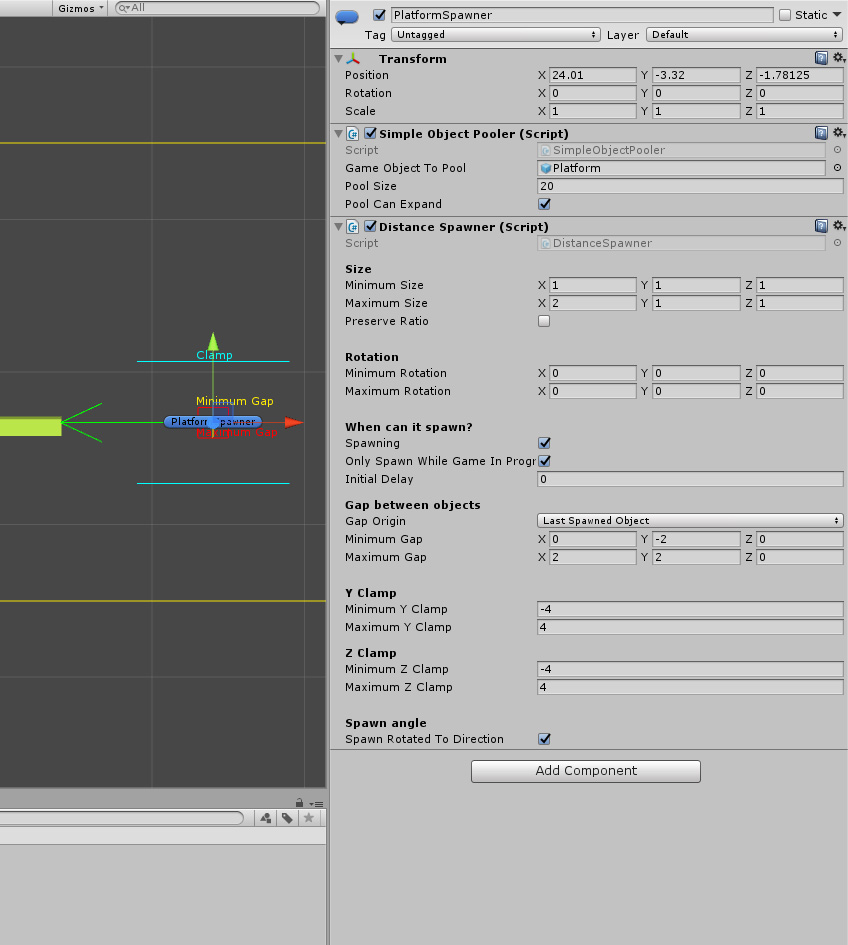
Let’s drag our Platform prefab into the “Game Object to Pool” slot of our SimpleObjectPooler component. This, at runtime, will create a pool of recyclable platforms for our spawner to pick from. This saves performance and handles all the hard work for you.
Moving on to the DistanceSpawner component, we want to leave the size and rotation settings as they are for now, but maybe change the maximum size’s x value to 2. We then need to set our clamps. Put -4 and 4 for minimum and maximum values for both Y Clamp and Z Clamp. These are the relative bounds outside of which we don’t want platforms to spawn. The last thing left to do is to define our gap between objects. We want our gap origin to be based on the Last Spawned Object. Let’s use these values:
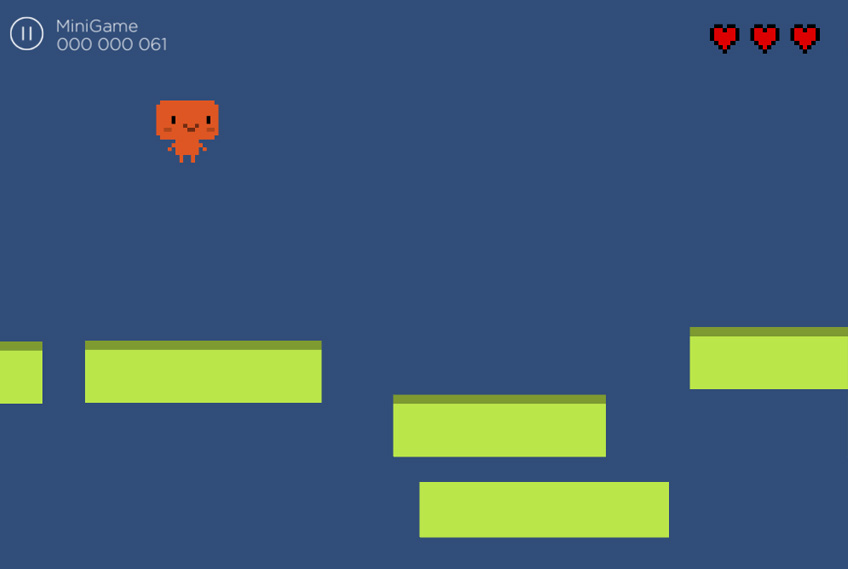
Your game is now ready, you can just press play (and then space otherwise you’ll die). ![]()
Conclusion
It’s just the beginning of course, you could add animations to your character, a better camera, a background, coins to pickup, and much more! That’s what all the other pages in this documentation are for, plus you can (and should) have a look at the demo levels included in the asset. They present various gameplays you can implement using the engine. Remember that at its core, the engine is really good at spawning stuff and moving it towards the player. With that in mind, there’s an infinity of games you can create!